Operating Guide
Version 3.3
- SMCR (Accountability UK)
- Compliance
- Risk
- KRIs
- Events
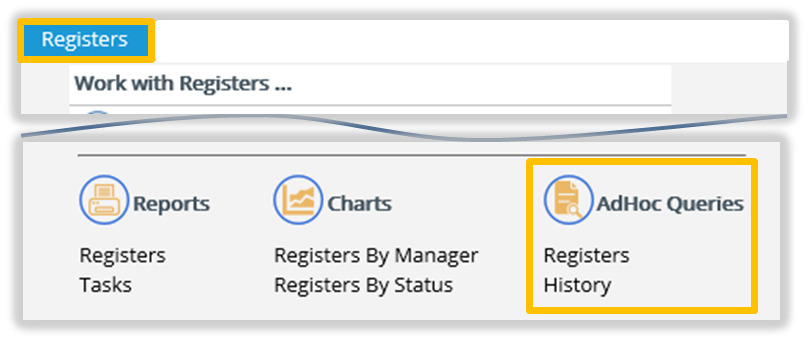
- Registers
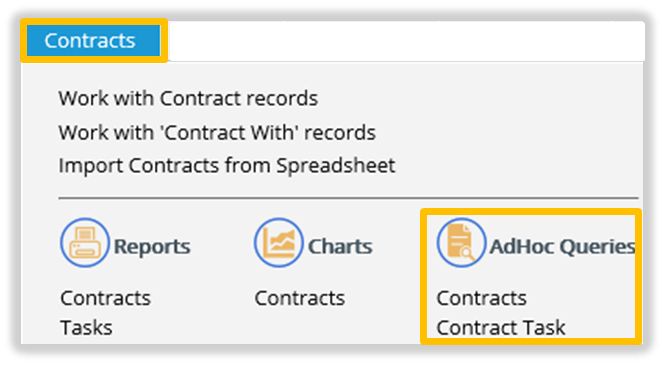
- Contracts
- Control Inventory
- Document Library
- Obligations
- Triage PRO
User Operations
Basics
My Summary
Portal / Mobile Device
Useful
Glossary
Managing Operations
SMCR (Accountability UK)
- Work with SMF
- Work with Prescribed Responsibility
- Work with Overall Responsibility
- Work with Committees
- Work with Accountable People
- Work with Certificates
- Work with Submissions
Compliance
Risk
KRIs
Events
Registers
Contracts
Control Inventory
Document Library
Obligations
Triage PRO
Outputs and Records
Dashboards
Reports Charts Adhoc Stats
Record Management
Alerts
Administration
Configuration & Maintenance
- TriLine GRC Configuration
- Configure SMCR Module
- Configure Compliance
- Configure Risk
- Configure KRIs
- Configure Events
- Configure Registers
- Configure Contracts
- Configure Control Inventory
- Configure Document Library
- Configure Obligations
- Configure Triage PRO
Current Tasks
Security
- The Security Centre
- Positions
- Portal Users
- Accountability Only
- Task Teams
- Security Groups
- System Groups
Monitor
Audit Trail
Current Topic:
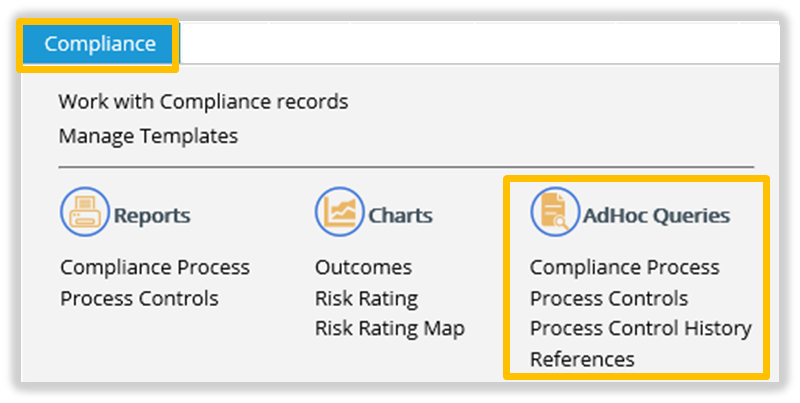
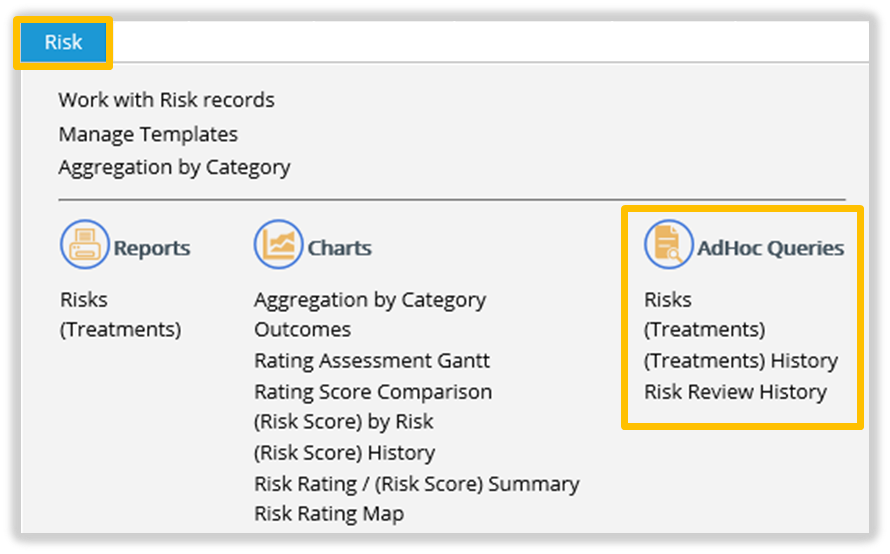
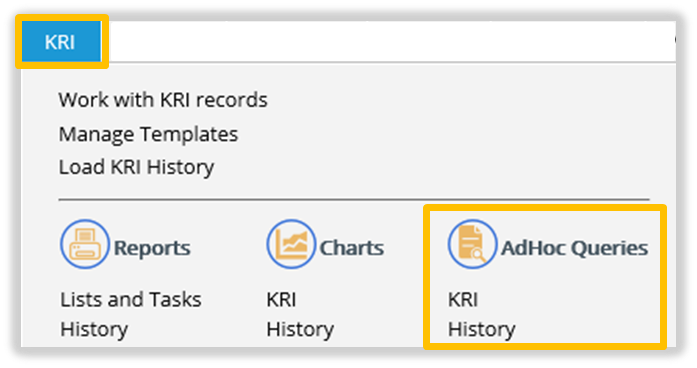
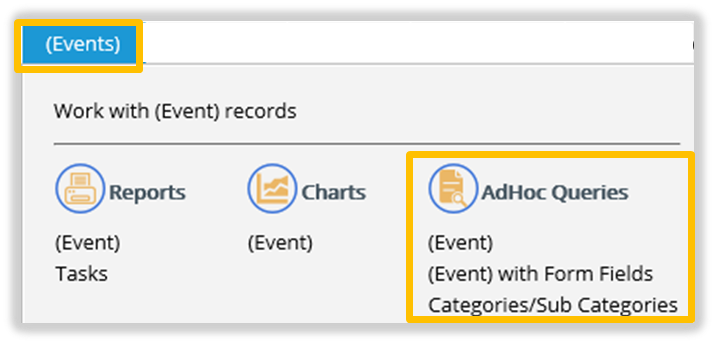
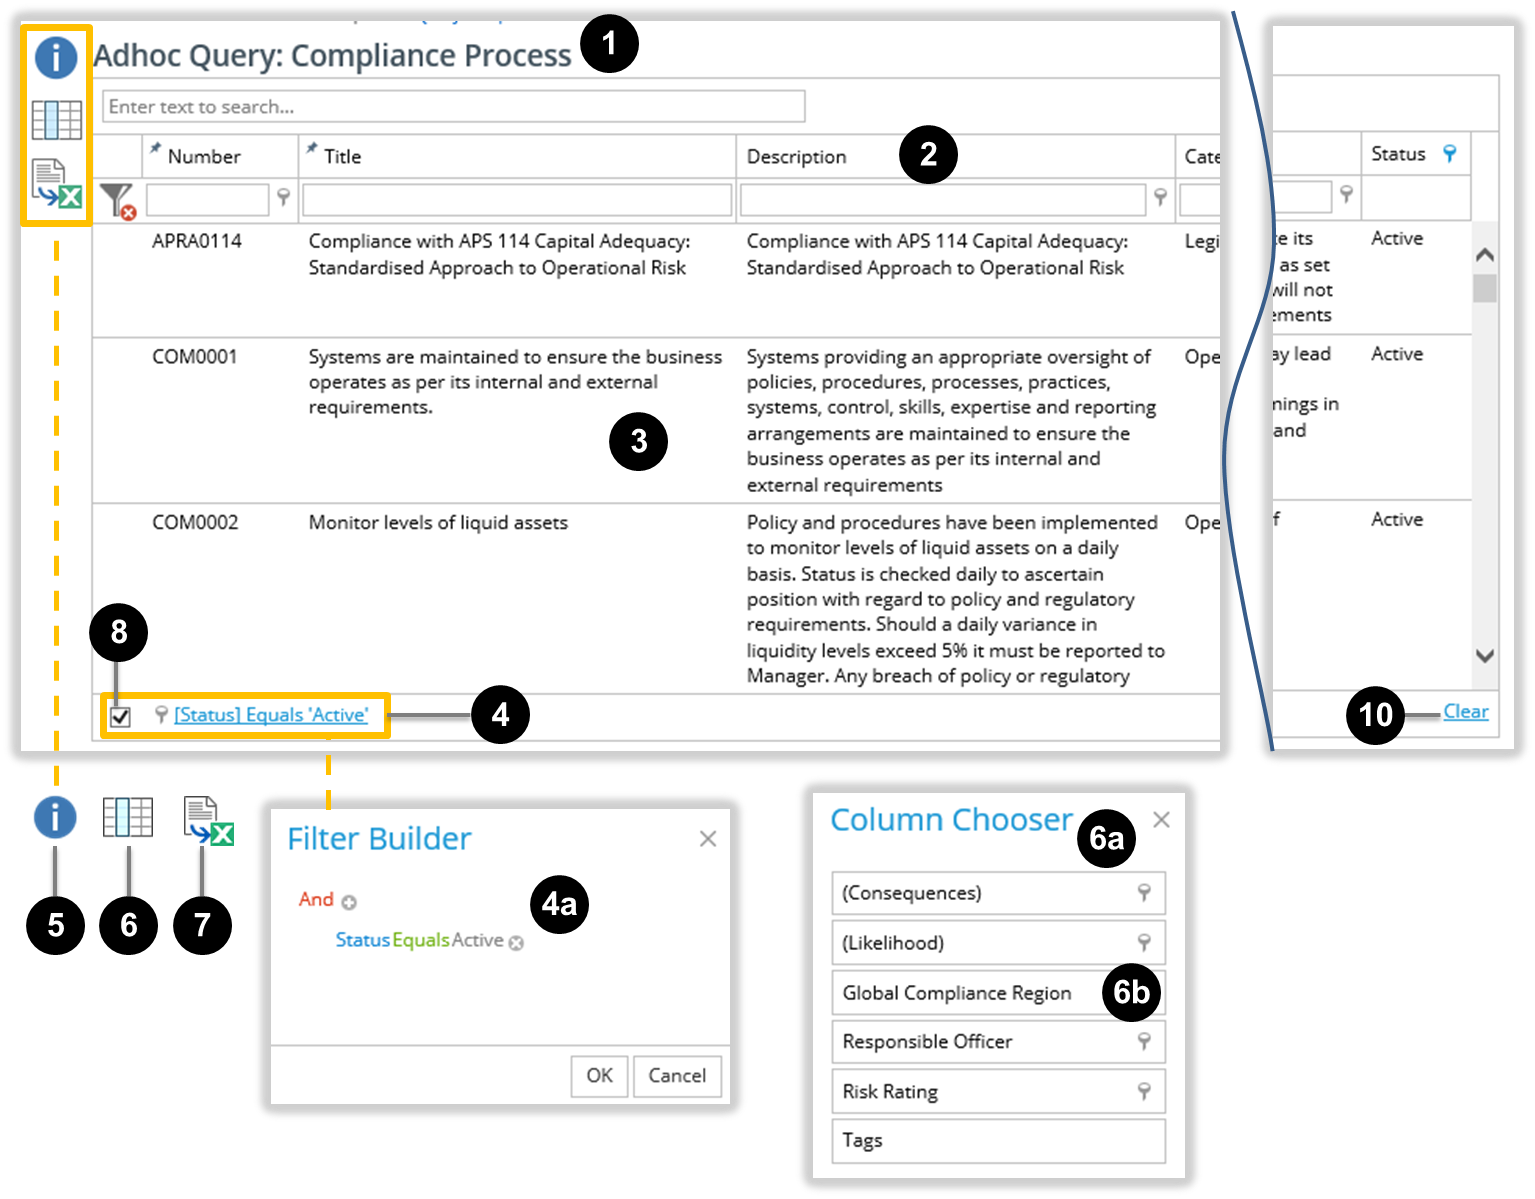
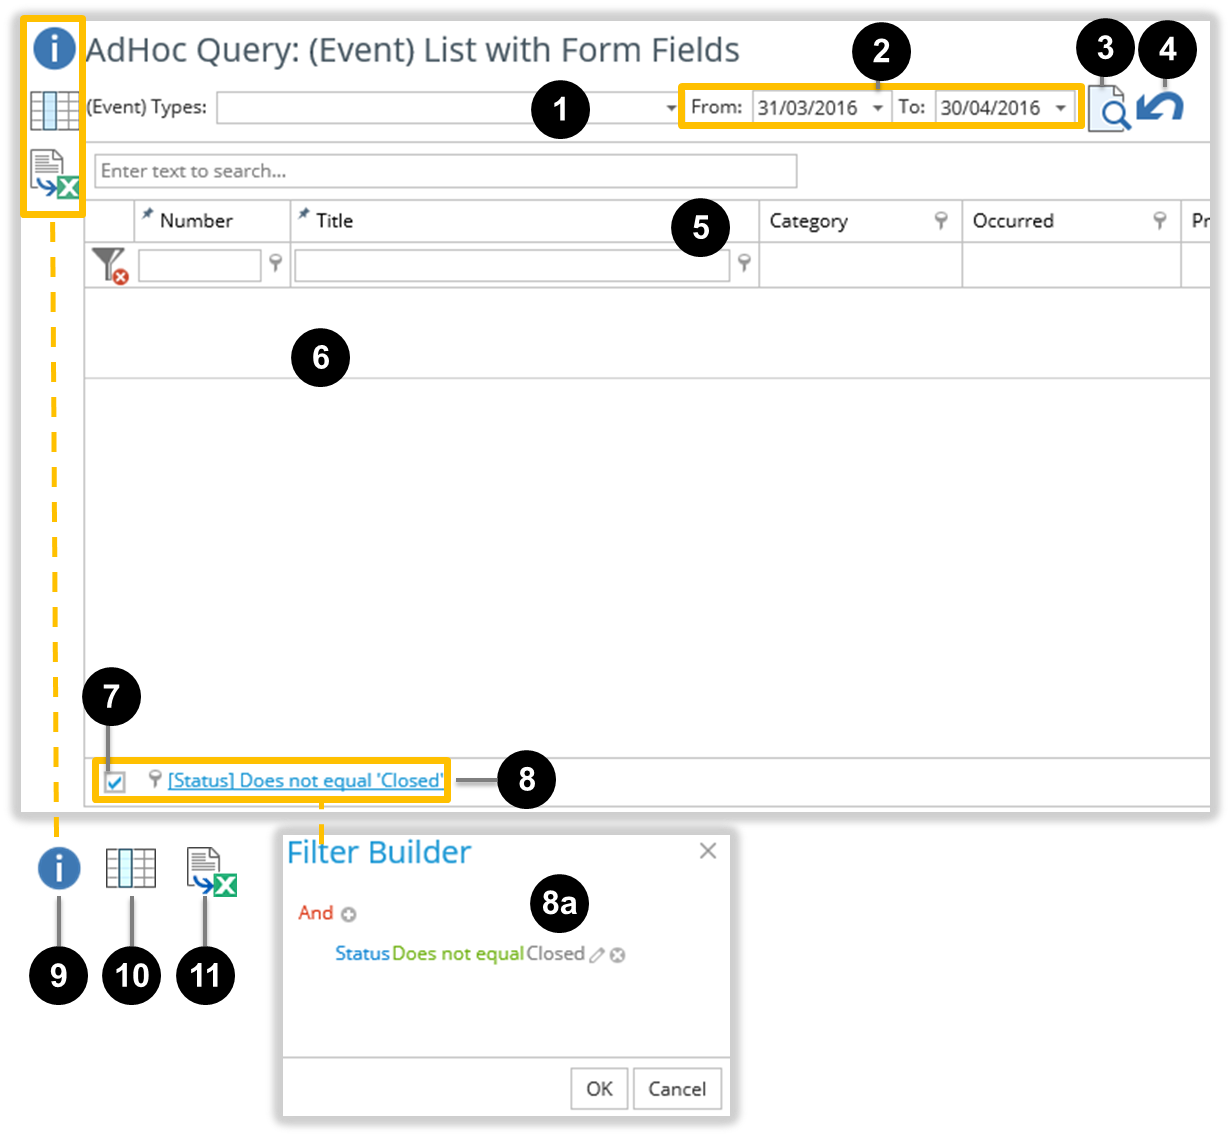
Adhoc Queries
© 2021 TriLine GRC. All Rights Reserved.